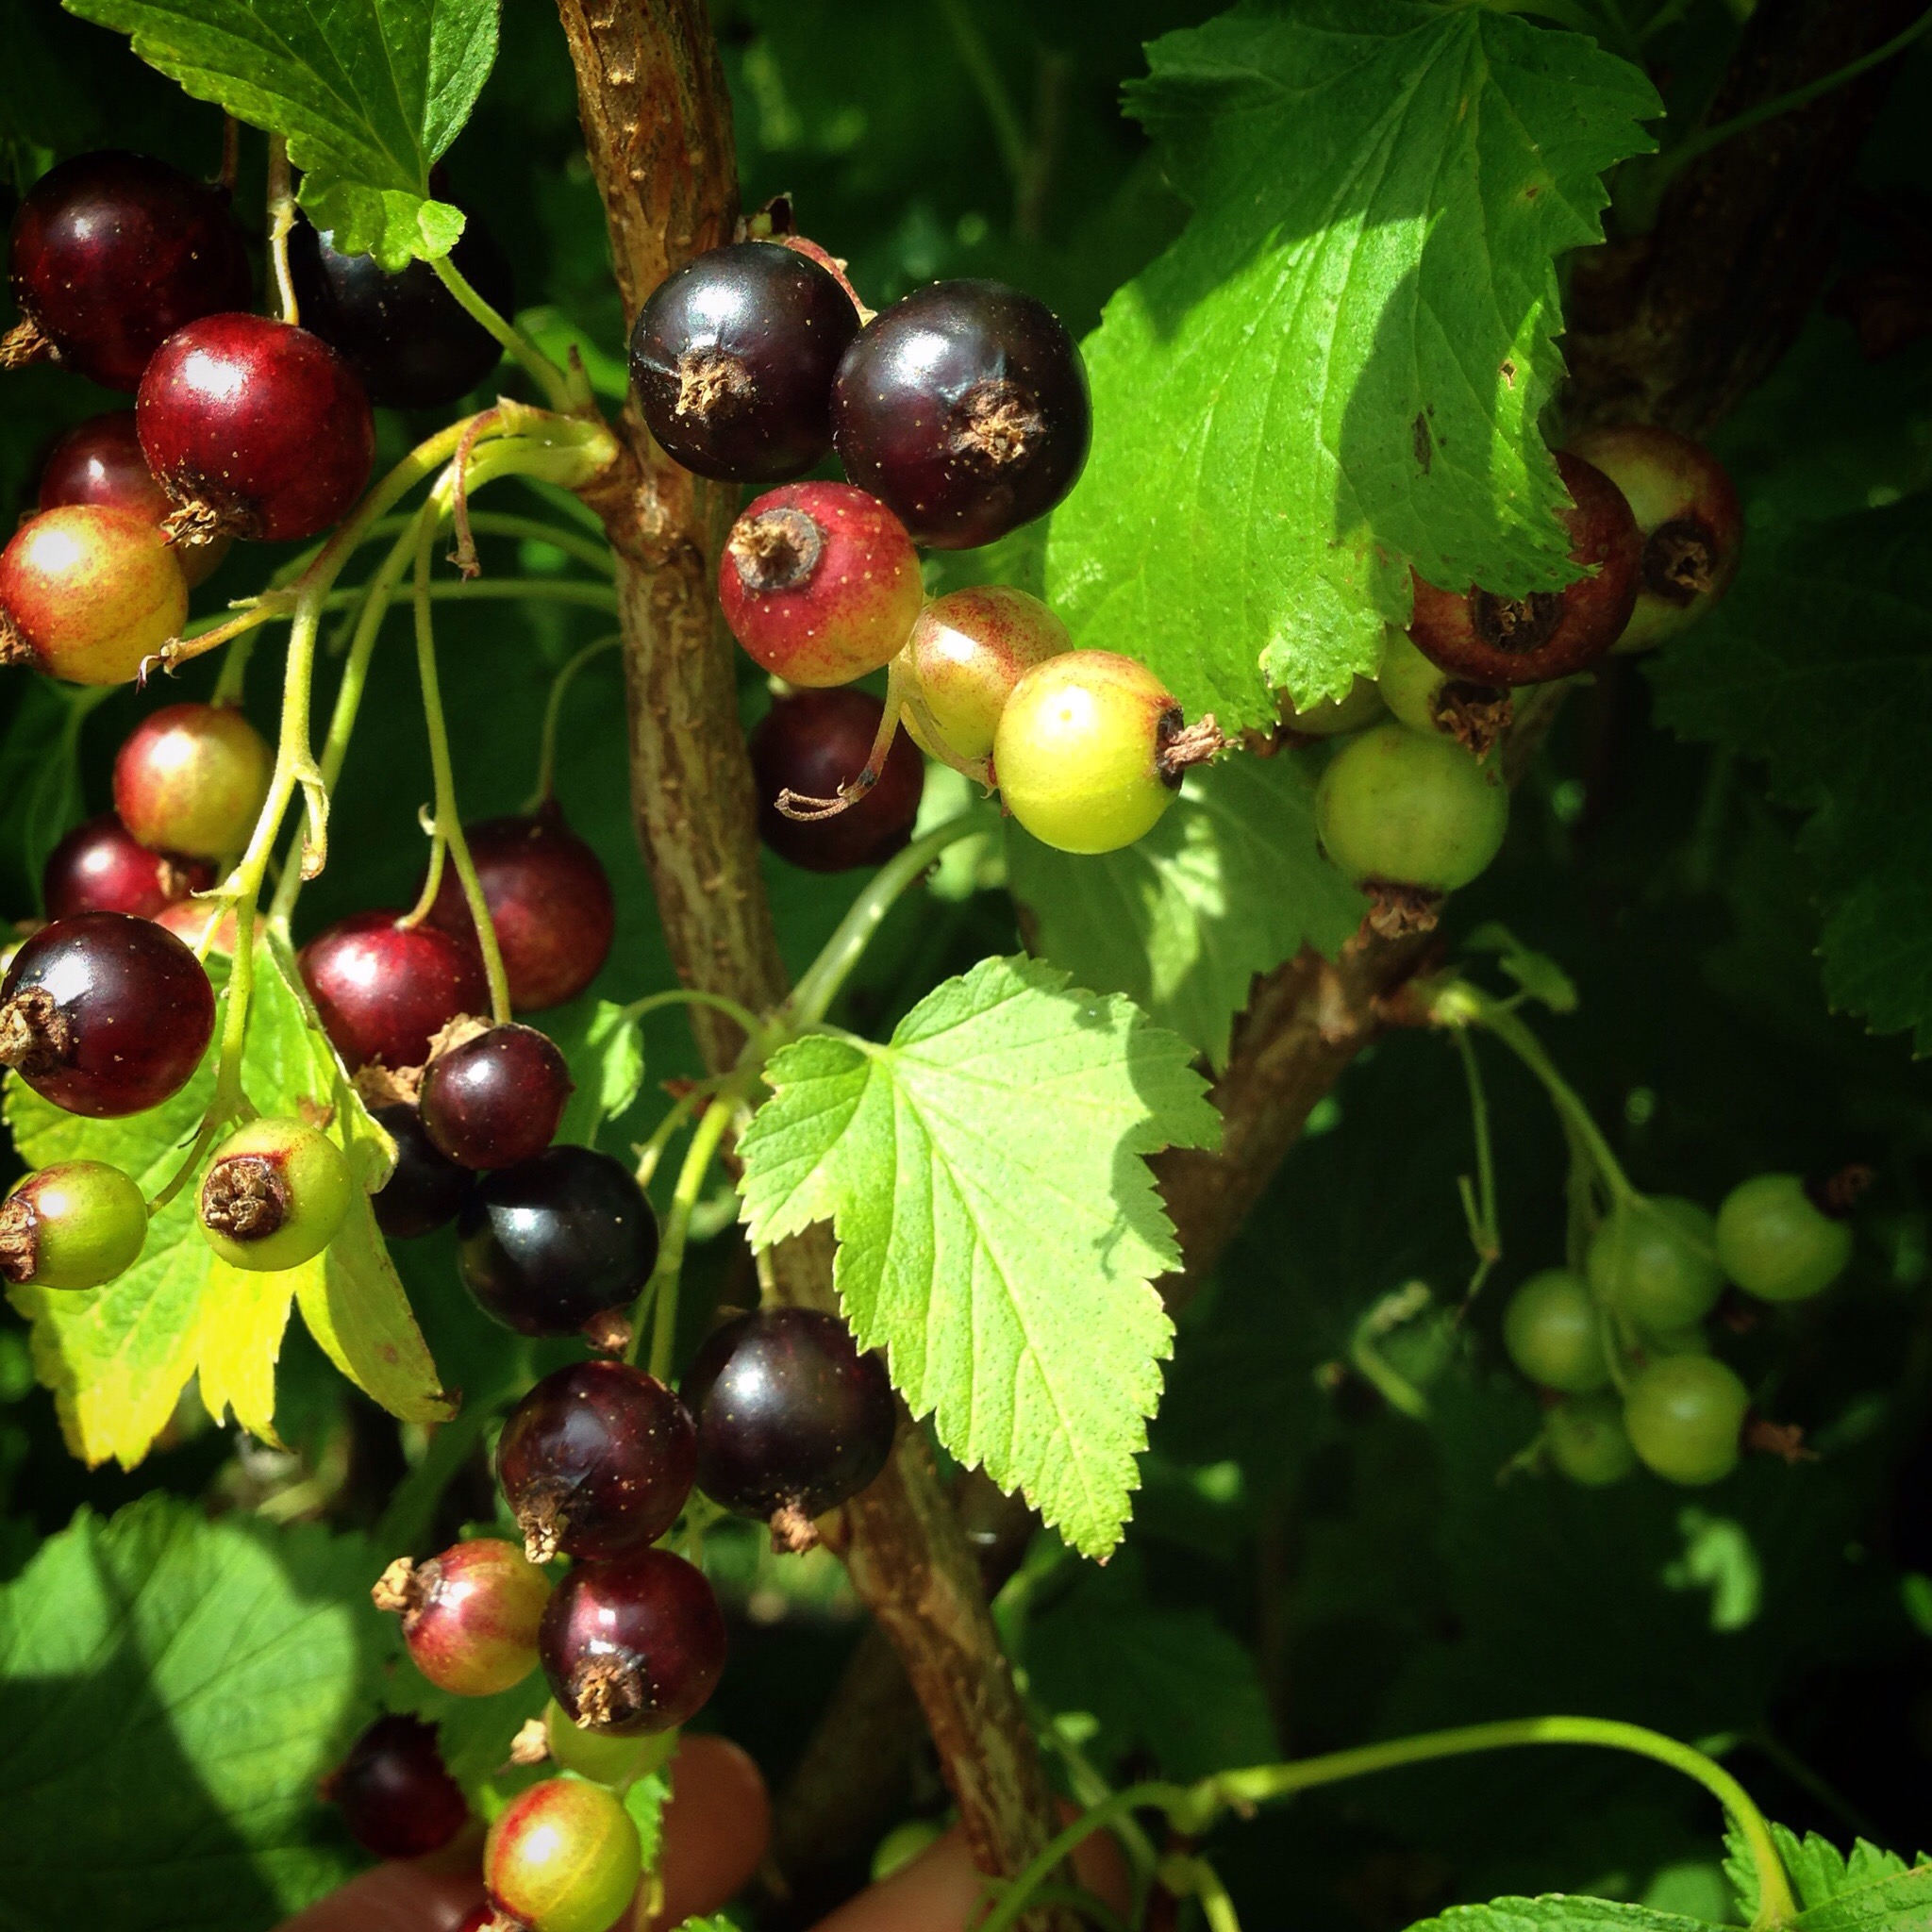
 This should be our best year ever for blackcurrants! We’ve never had so many, I can’t wait for hem to ripen! I’m out in the garden every day checking on them and picking any that are ripe, popping them straight in the freezer to use later. When we moved into our little house 6 years ago, there was an overgrown bush half covering the front door and dropping these little berries all over the floor. Whilst we were moving furniture and boxes into the house, many got trampled into the carpet and I vowed that this bush was going to be dug out and disposed of as soon as I had the chance! After realising that they were actually blackcurrants, I had a change of heart and decided to keep it. Tried to cut it back and train it into a suitable shape but it still dropped berries by the front door and the berries were few and far between and very small. I decided that it needed a new home with more sunshine. My Grandma told me that moving it was as simple as cutting off the stems and pushing them into the ground so that’s exactly what I did. All but 1 stem took and turned into a little bush of its own and I learnt to prune them properly. The first year after they were moved we didn’t get much but that was to be expected. Last year we had quite a few berries but not masses. This year, however, every bush has gone mad! My grandparents used to grow all sorts of fruit and veg in their garden, including blackcurrants and homemade blackcurrant jam was a staple. My Grandma and Mum used to make hot blackcurrant drinks using a spoonful of the jam and mixing it with slightly cooled boiled water, then strained through a tea strainer. I can’t wait to make my own jam (hopefully!) this year. If we have enough blackcurrants, I’d like to try some sort of cordial or sauce too. Now to find some recipes…
Category: Blog
Allotment visit – 30th June/1st july

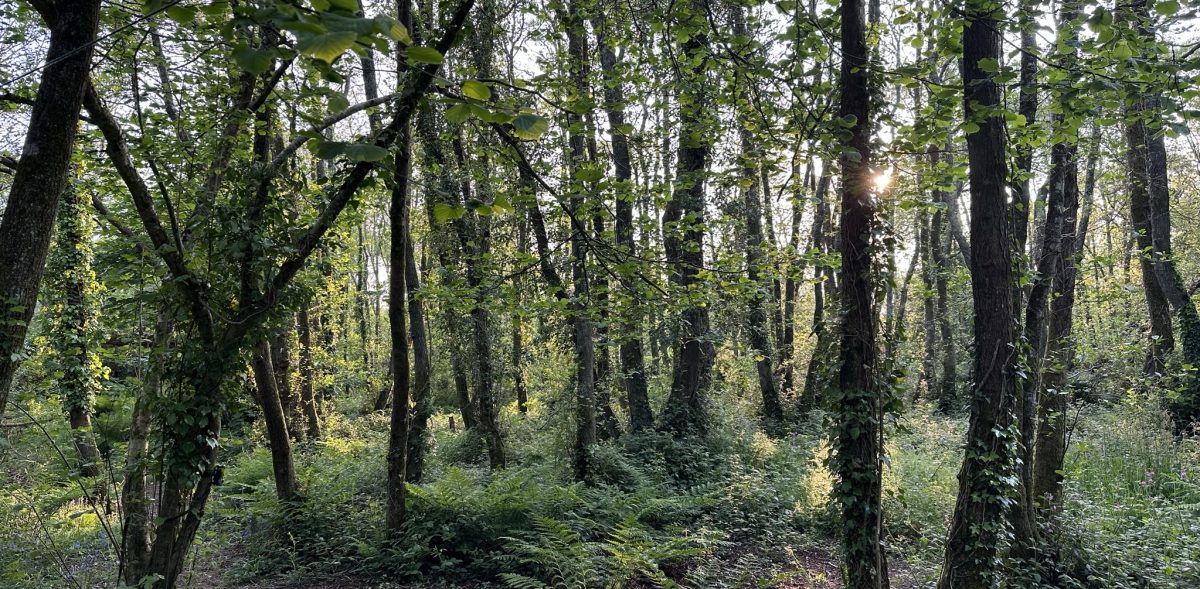
Summer arrived here in Cornwall yesterday! High temperatures and glorious sunshine all day long meant that the allotment was really going to need some TLC but watering was going to have to wait until quite late in the evening. After visiting my best friend to help resolve a ‘which dress to wear’ dilemma, it was nearly 10pm when I stopped by the allotment. The temperature was finally dropping (but still not enough to need a cardi!) and it was light enough to spend a good half hour watering everything. I gave everything a good soak (except the onions, which I’ve read you should stop watering when the bulbs are starting to swell) and was thrilled to see some ripe fruits on the raspberry canes, flowers on the peas and beans and even a fruit or two forming on the sweet and chilli peppers in the greenhouse! After feeling for so long that this year might not be very productive and that we’d missed the chance to enjoy fresh peas, it is wonderful to finally be seeing some progress.
So this morning, I couldn’t wait to get back down there in the light of day and really see what’s happening! I was indeed met with the sight of 20 or 30 flowers on the peas (variety – Onward), 2 flowers on the runner beans (which I didn’t think would produce anything given the state they were in!),
  just 2 ripe raspberries (but more looking like they’ll be ready in just a day or 2!) and courgettes (varieties – Zuchinni and a rogue seed from last year) flowering and fruiting (is it a fruit?! You know what I mean!).
 I’ve never had any trouble with courgettes when growing them at home, they’ve always been so prolific we’ve been sick of the sight of them after a while! Maybe the more exposed conditions at the allotment have really slowed them down because we’ve barely had a flower until now. But there they were, in all their glory! There are at least 2 or 3 that, although tiny, could be picked now. I will wait a few more days as I already have some in the fridge to use up first. It’s so exciting to see things growing and fruiting!

The rhubarb has really picked up in the last week or so. It was a small plant when I bought it, just 2 or 3 stems on and these quickly got damaged by the wind. I was a little worried that it wasn’t going to recover, but I really shouldn’t have worried at all! It is booming! I won’t be harvesting from it this year but I think it will be good to go next year. I’ve seen an interesting rhubarb jam/butter recipe that I’d like to try. We only ever really had it stewed or as a crumble when I was growing up and, although I don’t mind eating it like that, I’d like to try something different with it.
The onions are looking good, too. As I said, I’ve stopped watering them now, a couple went to seed but I’m letting them do that and I’ll try to save the seed for next  year – I’ve never done that before so we’ll see how it goes! I’m growing a red and a white onion, I can’t remember the specific varieties. Interestingly, none of the white onions went to seed, only the red. I don’t know if the variety has been bred to avoid this or if it’s just luck that the white onions haven’t produced seed but the red have. I’ll have to try and find the packets – I’m sure I kept them!
I started some more Dwarf French Beans (variety – Borlotto Firetongue I think!) in the greenhouse last week as the originals died outside. I really wanted to try these as I just love the colour of the beans and think they’ll be good for winter storing and using in stews and maybe some home made beans on toast! They are just starting to peek through, as are the cauliflowers and kale that I planted at the same time. The cauli and kale were free seeds with a gardening magazine. I just wanted to give them a go as I’ve never tried to grow either before! There are plenty of seeds left over for next years plants. I’m quite surprised that they are coming through already – I guess the conditions have just been right for them.
Weeding was the order of today, after I’d finished inspecting the veg and talking to myself about how much they’d grown or were ‘coming on nicely now’… passers by and the builders working opposite probably thought I was a bit nuts! Once my fingers were tingling from stinging nettles and I cleared as many weeds as I could bear, I started boxing up the mammoth harvest of summer raspberries (ha ha! maybe one day…) and picked some elderflowers for my next batch of elderflower cordial (the first lot is long gone and the second batch is well under way!).
Home for a much needed cup of tea and to write this up… my fingers are still tingling!
A day with the chickens

As you may have seen, we have two chickens that we keep at home in our garden. I thought I’d take you through what we do with the chickens on a daily basis.
During the summer months, we don’t tend to shut the chicken house up at night. This is to help with ventilation and to avoid having to get up at stupid-o’clock in the morning to let them out. They have been pretty noisy early in the morning until we’ve let them out before and as we live in a mid terraced house, I didn’t want the neighbours to have issue with us keeping chickens. So when it starts getting light very early and the nights are nice and warm, we have found that the ‘girls’ are happy to come out early and just potter around until 6:30-7:30am when we go out and feed them.

We use a ‘layers mix’ pellet feed that we buy from a local farm supplies store. It’s only about £3.50-£4 a bag and a bag generally lasts about a month so certainly doesn’t break the bank! The girls get a cup of food in the morning, we sprinkle it around their ‘scratching bed’ (unless it’s very wet) so that it takes longer for them to eat it and is more interesting for them to have to ‘find’ the food.
We then clean the poo from the house and anything on the path. We used to put this straight in the compost bin but found it seemed to be slowing the rate of the composting process so now we are storing it in a seperated bucket and allowing it to dry out with the intention of using it down the allotment.
The girls rarely lay first thing in the morning, so cleaning the house out first thing helps to keep the eggs nice and clean. Their water is topped up daily and about once a week the water bowl is washed out thoroughly. Occasionally we add a few drops of Apple cider vinegar which is supposed to help stop the water getting a build up of algae and is supposed to be good for the chickens too. They seem to like the taste which is another plus! Later in the morning, if I’m home, I will go and look for eggs and often find some weeds, snails or surplus veg leaves (beetroot is a favourite) to give the chickens.
The aftenoon is generally when we let them out to roam the garden. We only have a small garden but there are plenty of nooks and crannies to find bugs, worms and vegetation to pick at and scratch about. Whenever I sweep up piles of leaves and soil, I tend to leave most of it in a corner somewhere, then the next time the girls are out they have something new to scratch at and there’s always plenty of bugs to find!

 Blue has recently discovered how to get to my strawberry plants! She is very pleased with herself when she manages to get a nice juicy red strawberry!
All it takes to get them back in their run is a small amount of feed in a cup (they seem to recognise the cup we use now and will follow it anywhere!) and a call of ‘ chook chook chook!’.
A few potatoes!
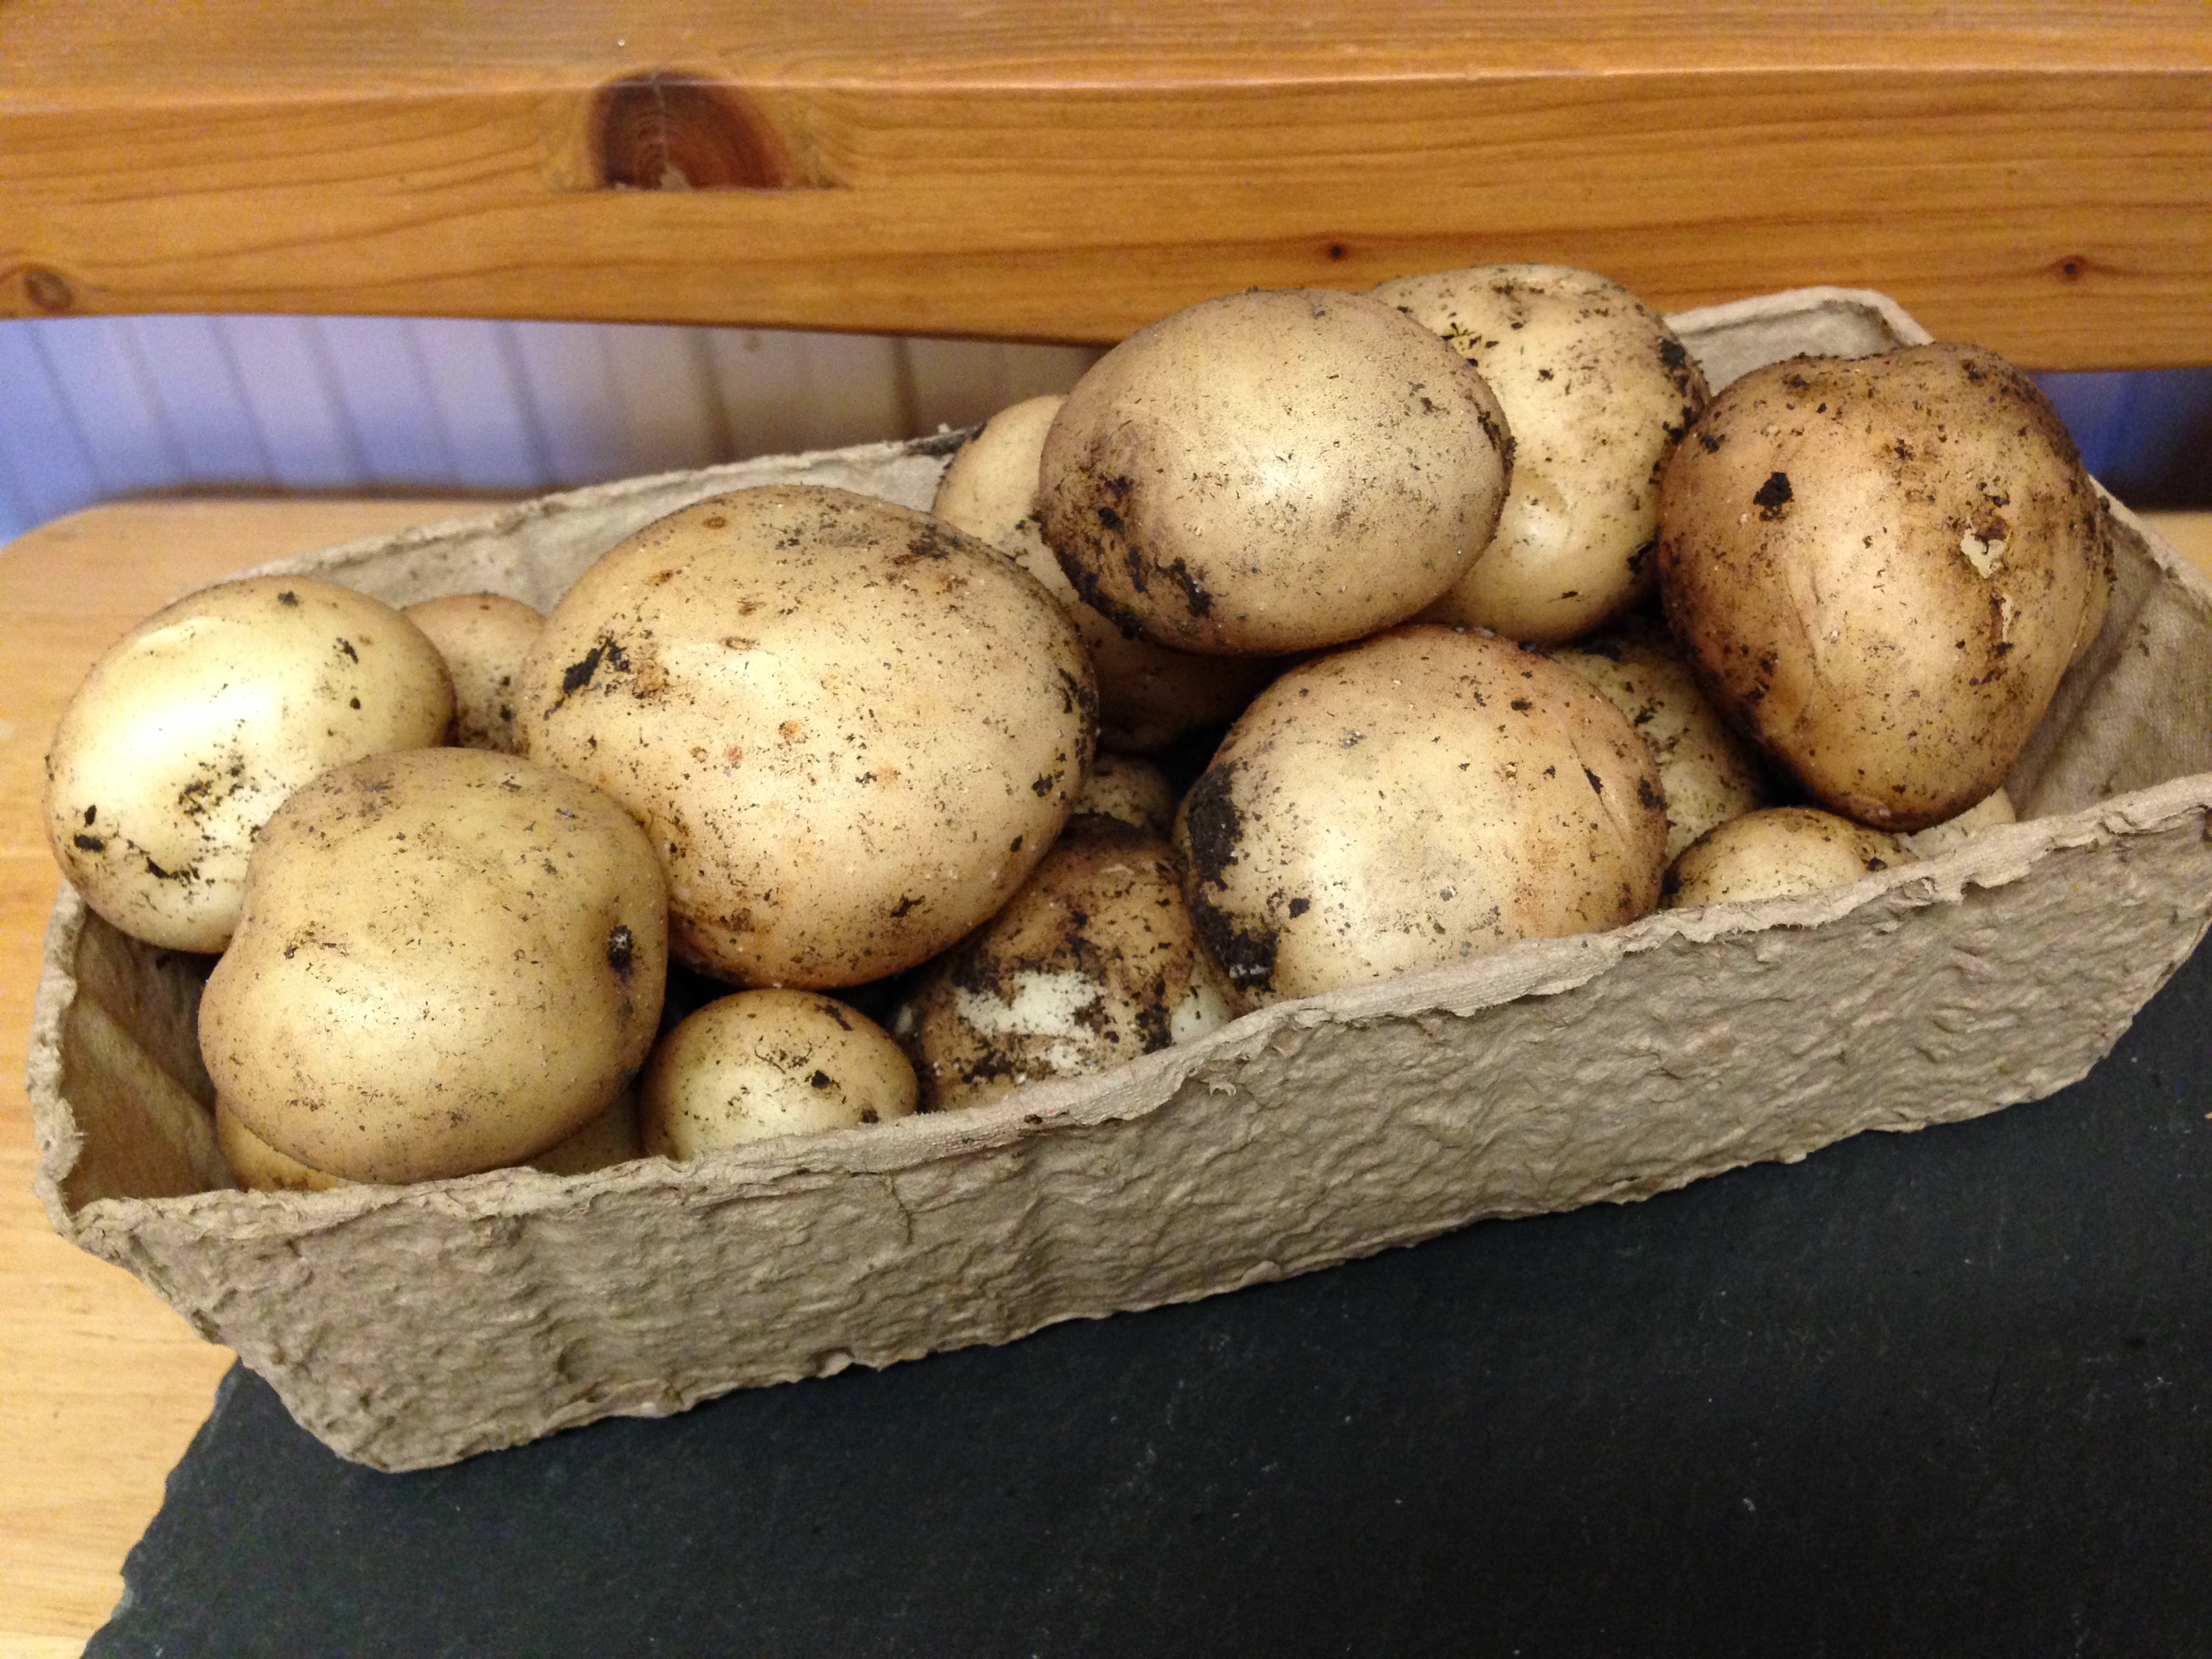
 We dug a few potatoes up at the allotment this evening!
These were supposed to be first earlies, but we rarely eat much in the way of potatoes so most of our plants have stayed in the ground (lesson learned for next year – we don’t eat many potatoes so don’t plant many!). Ashley noticed whilst visiting the allotment this weekend (I was at work) that the potato plants were looking yellow and there were lots of brown bits appearing on the leaves and stems. We weren’t sure if this was blight or not, so erring on the side of caution, we have pulled and dug up the plants that seemed to be affected. The tubers themselves look fine so I will be brushing the worst of the soil off and storing what I can in the fridge. The bigger potatoes will go in bags or boxes but I don’t think they’ll keep very long so I’ll have to get creative with some potato based recipes! Ashley’s Gran has been given some already and Ashley will be taking some into work for two of his colleagues tomorrow so I hope we won’t be wasting any.
We now have half a bed empty which will be perfect for my kale seedlings that are coming on. I will have to do an allotment update soon, things are coming on nicely!
Thanks for reading!
A ‘no dig’ bed
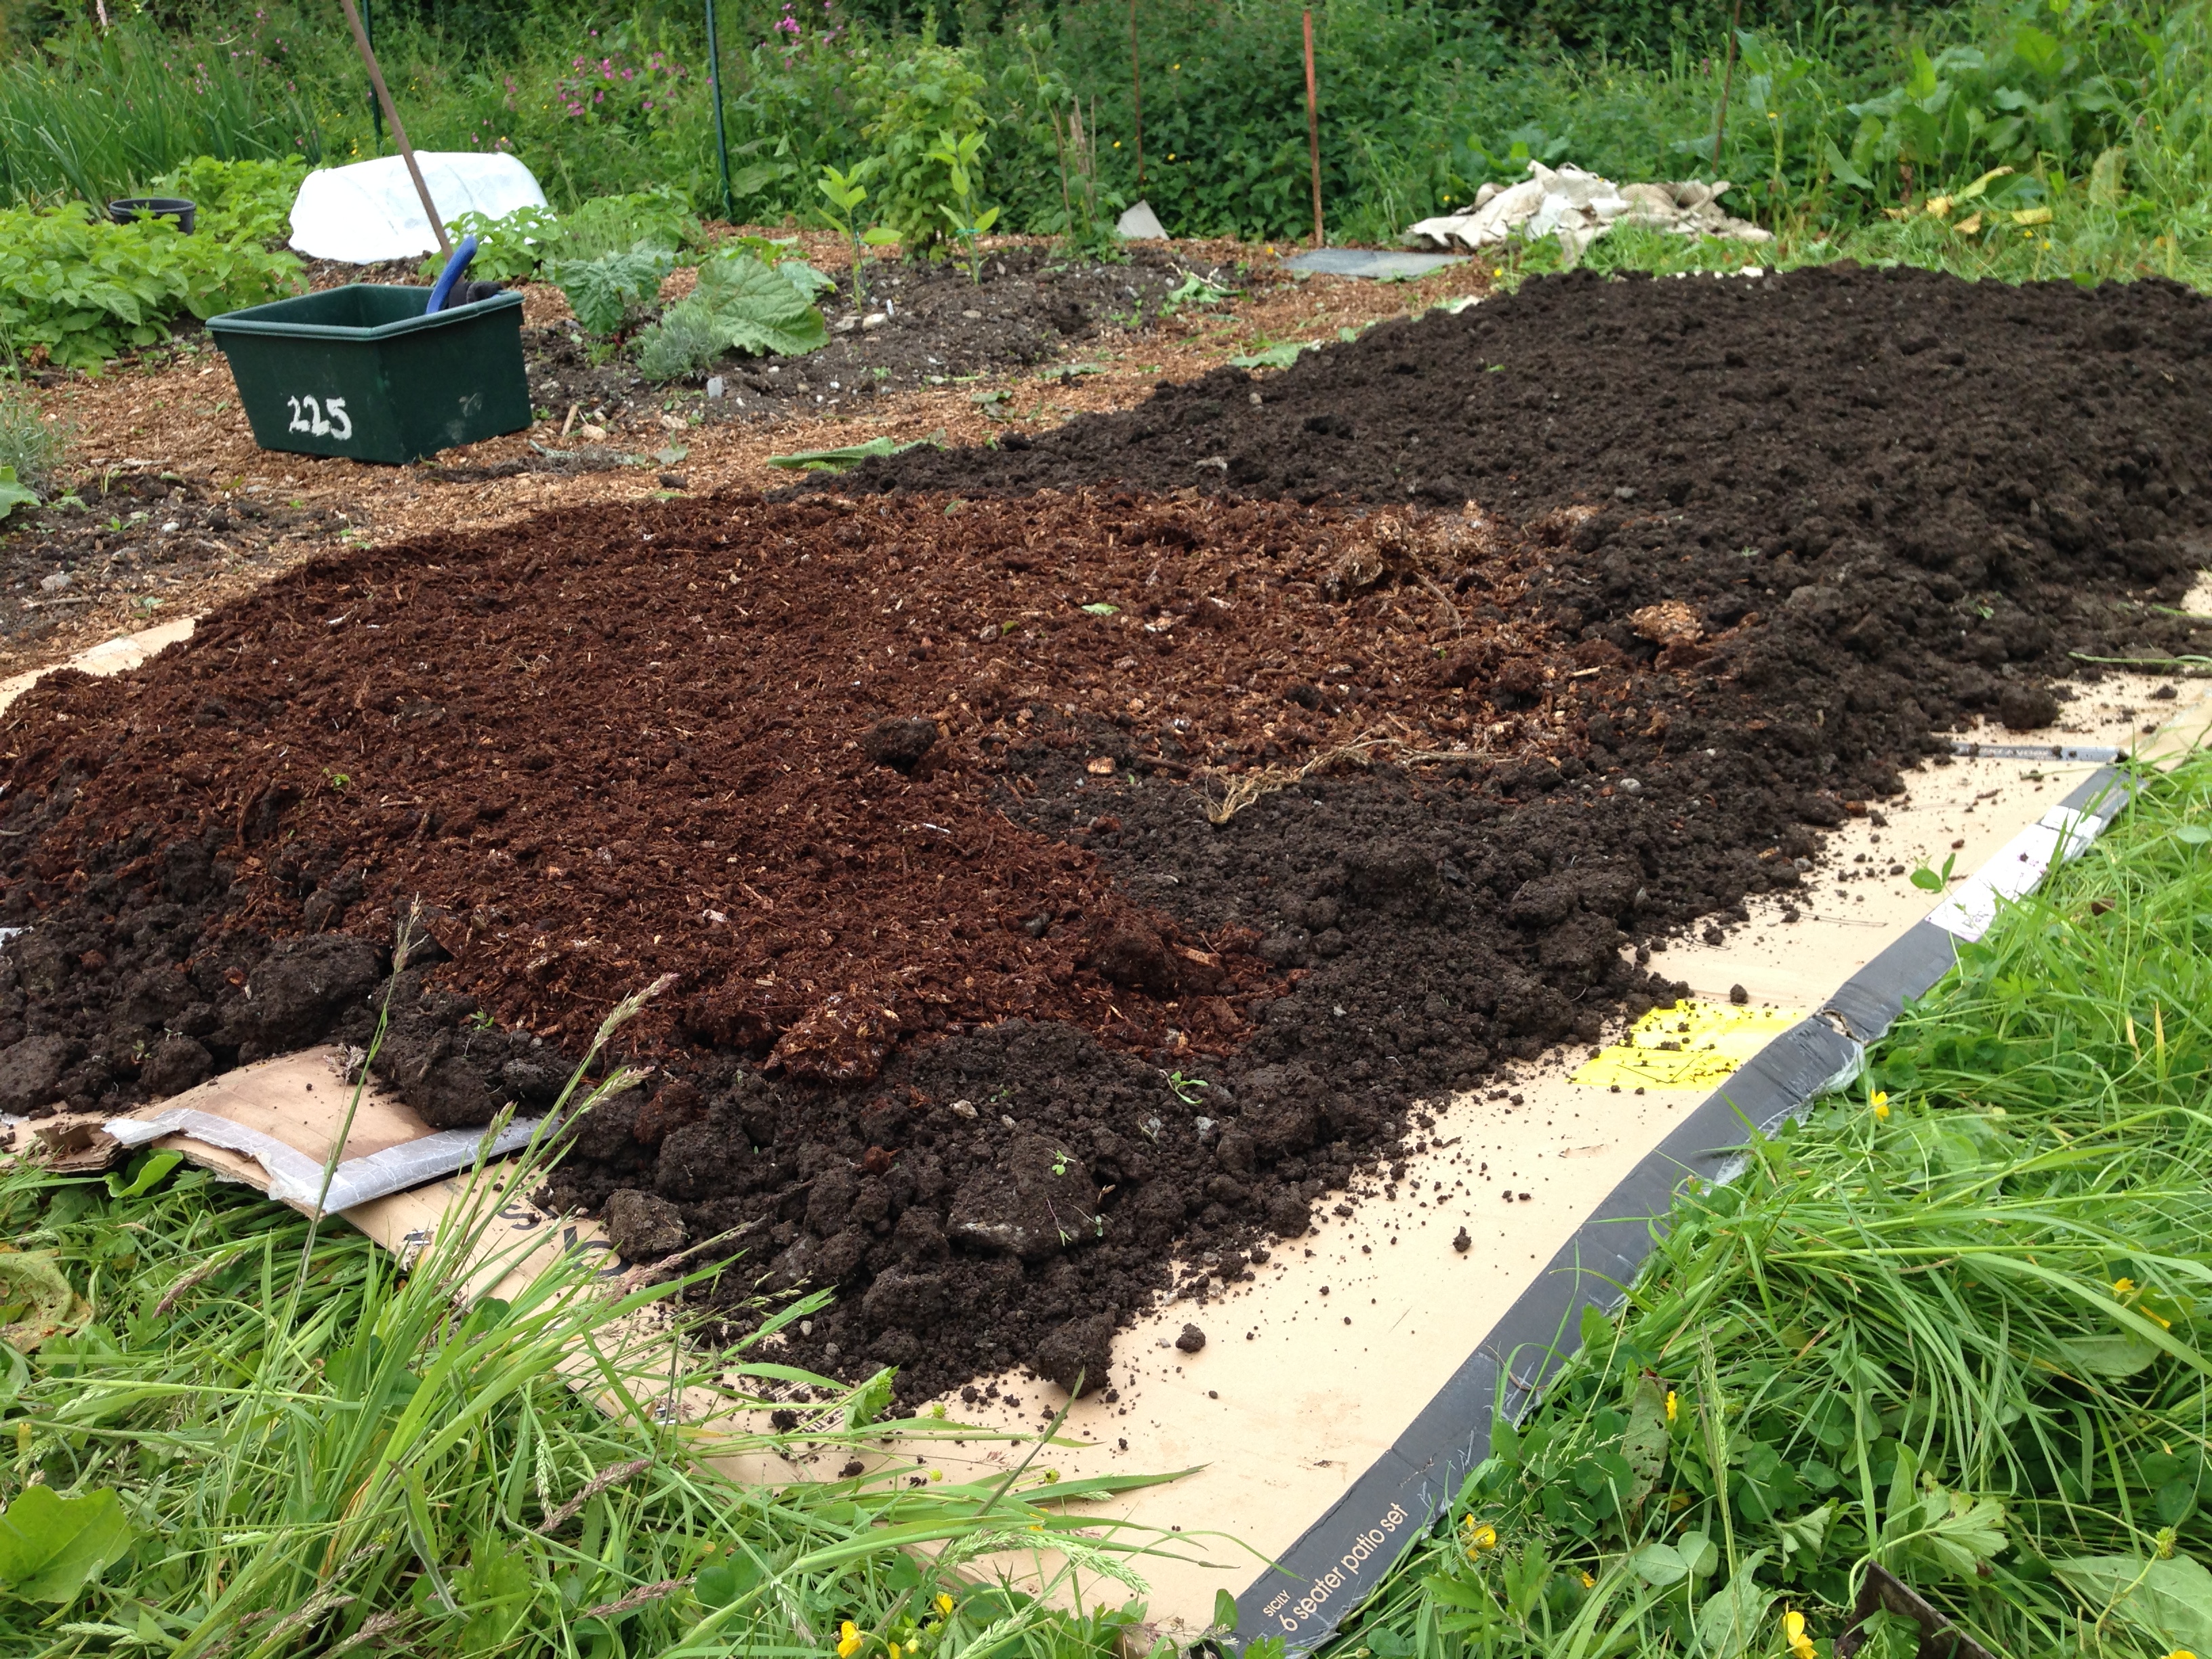
I thought I would share with you the process for building a ‘no dig’ bed. We have learnt this from our Charles Dowding organic veg book. I’m not sure we’re doing it quite right – Charles leaves areas covered with carpet or black plastic for months before building the bed but we have been impatient and skipped this step so that we can get growing a bit quicker. As a result, we suffer with the dock popping up all over the place. Hopefully there won’t be as much next year. We also only use wood chip and rotted manure as that’s what we have freely available, with a little of our home made compost as it’s available. Our vegetable beds probably aren’t the most nutrient rich at the moment but seems to be OK for what we are currently growing. We will be adding as much home made compost as we can when it’s available.
 The first ‘layer’ is cardboard. It needs to be a decent layer with good overlapping. We probably should have used a bit more elsewhere on the plot so for this bed we made sure we didn’t scrimp on this step. The cardboard should be thoroughly soaked with water (we have found it easier to do this after laying it).
Next we added a layer of well rotted manure, then wood chip. We then built up much thicker layers of manure and wood chip until we were happy with the depth, finishing with the manure layer. The Charles Dowding book and website are well worth a look to see how he builds his beds. Looking at the bed now it’s finished, it’s a little big. The no dig method also relies on not compacting the soil by standing on it and so the beds are generally a bit smaller to facilitate this. I can reach the middle from both sides but we made this bed much deeper than all the others, so with the hight it can be a little difficult to reach properly without standing on it. I will have to make sure I always stand on a board to avoid compacting it too much.
 I have plans for the leeks to go in this bed. There should be plenty of room for them and lots more besides!
Citrus cleaner
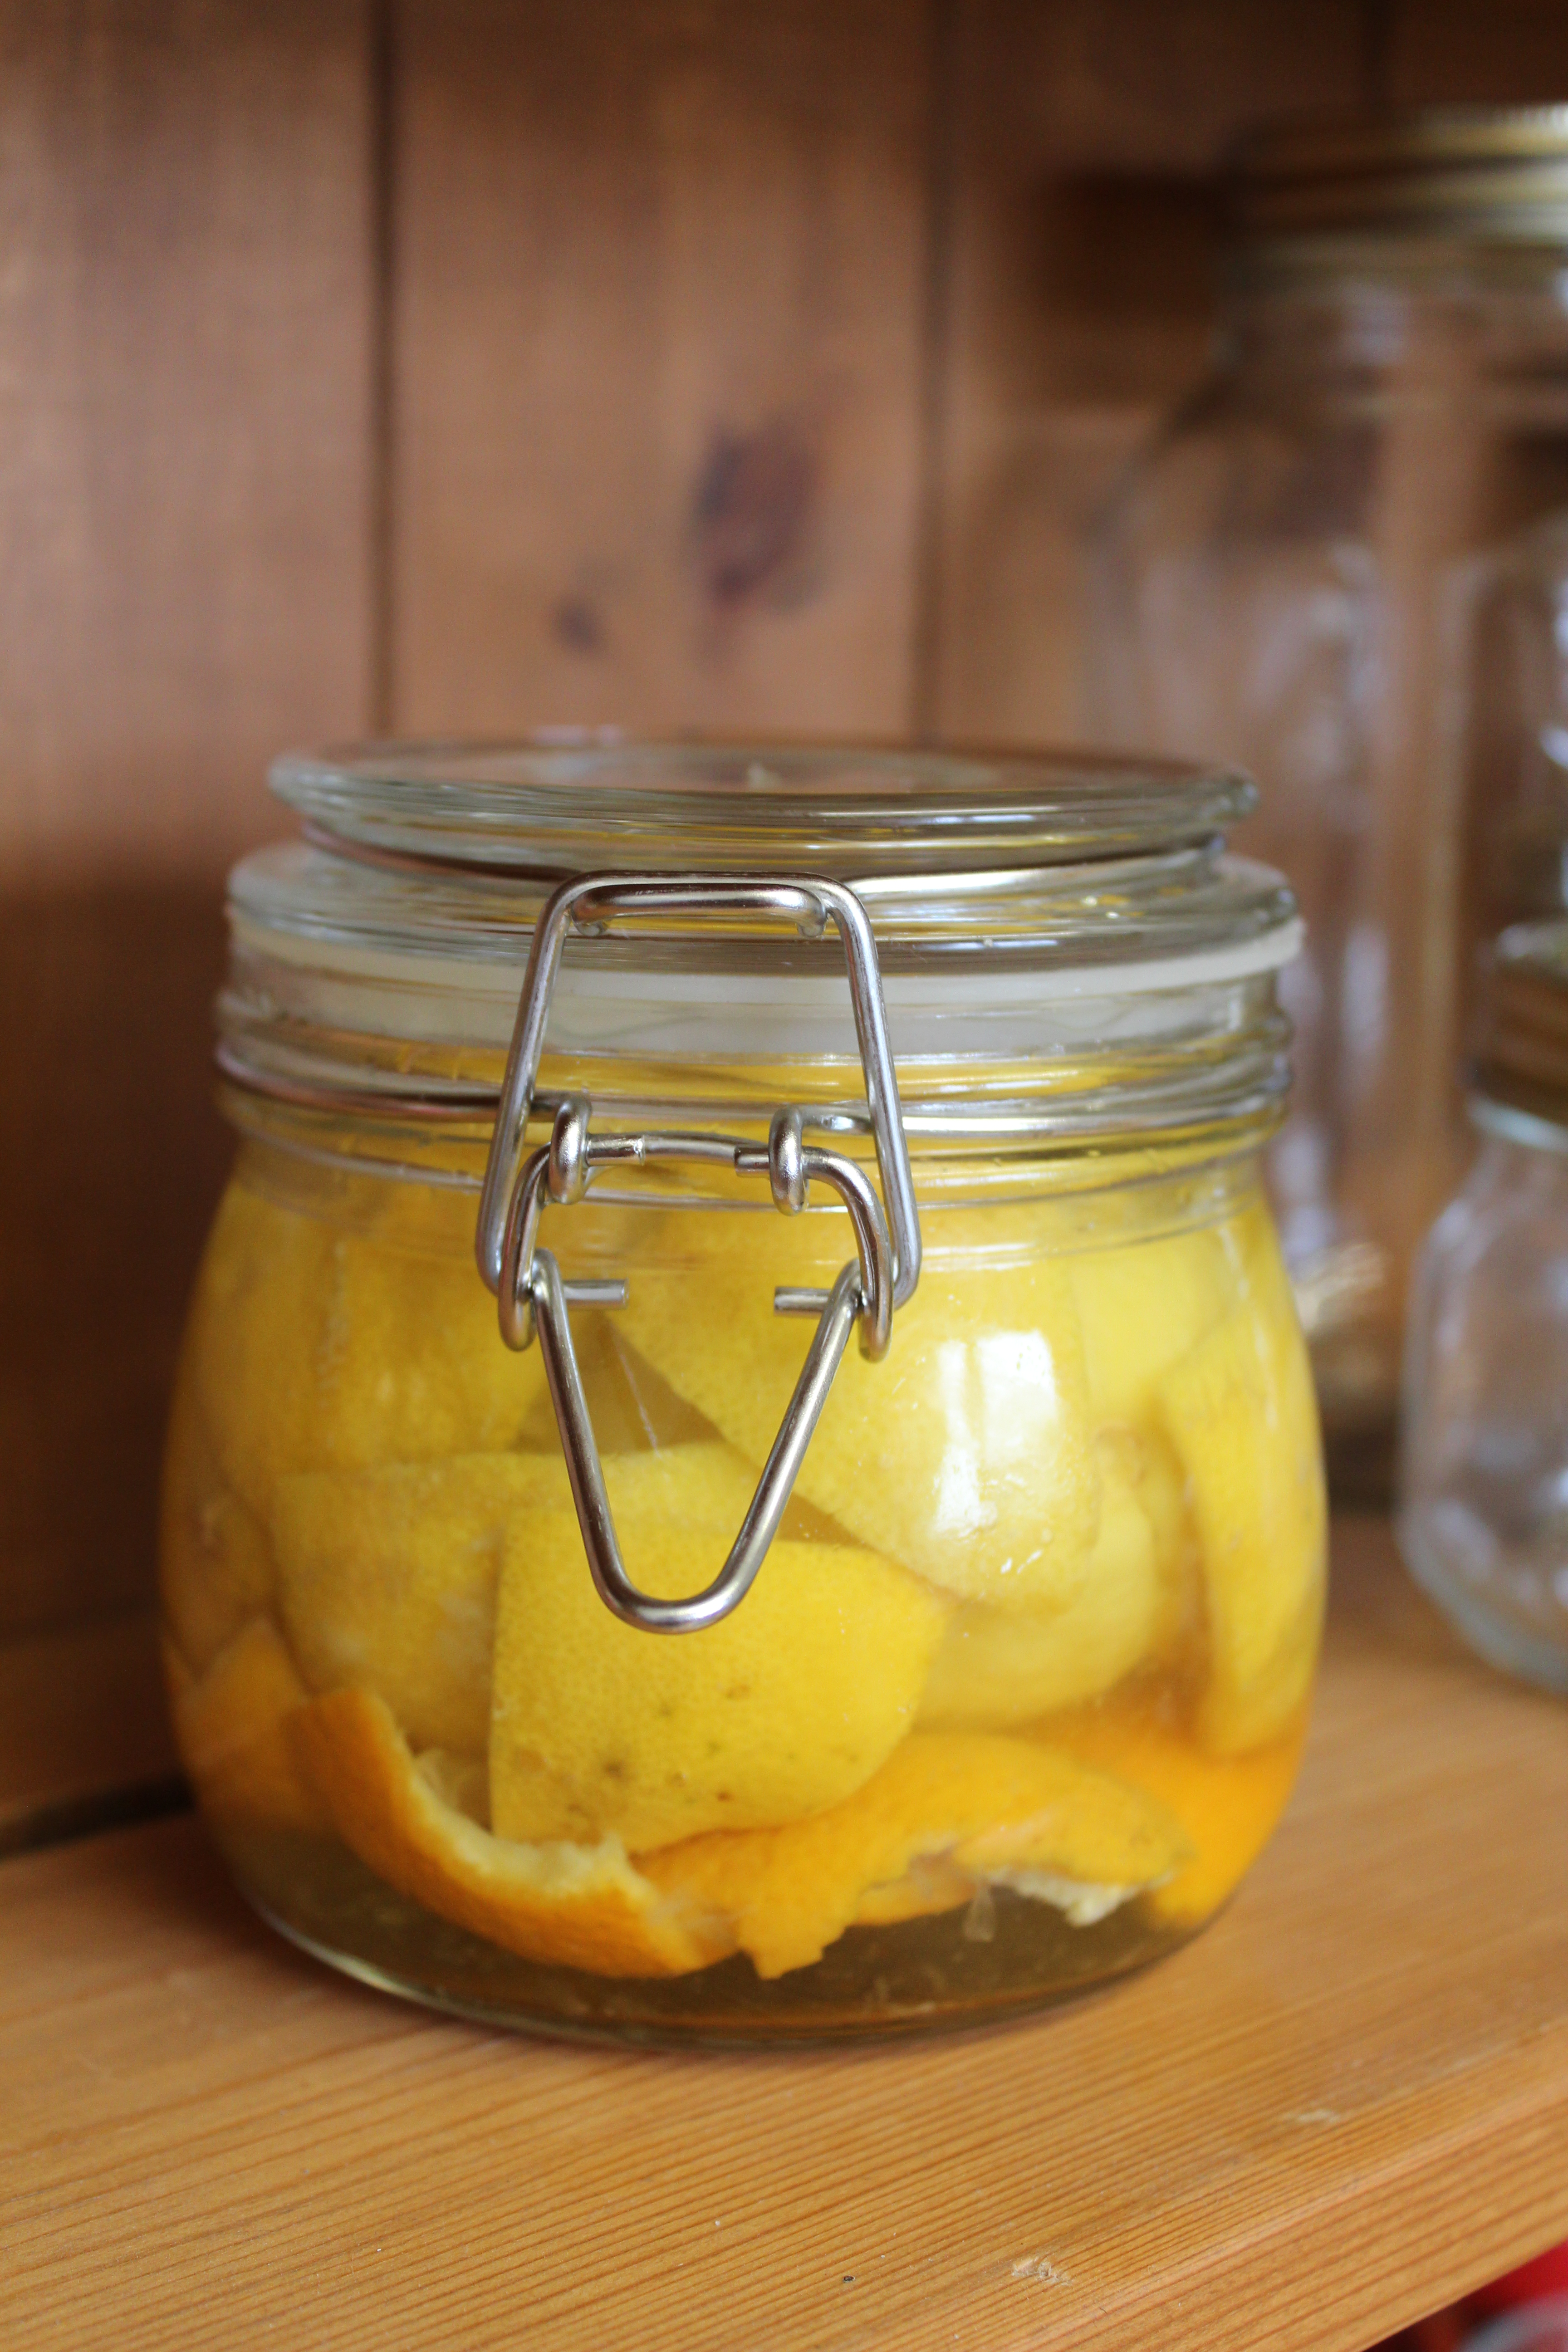
I mainly use my citrus cleaner in the chicken house as it is all natural and shouldn’t harm the chickens. I read about it first in a chicken keeping magazine that we purchased when we first got the girls. I spray the onside of the chicken house, give it a good scrub then rinse it off. It is simply storing lemon and orange peels in a jar filled with white vinegar for a few weeks.  Then strain off the liquid, dilute with water and voilà! After several weeks in the jar, the vinegary smell is overpowered by the citrus. I have nearly run out of my original batch so have started another. With recent batches of jam and elderflower cordial made, I’ve had plenty of lemon peel so that has made up the majority of this batch. It’s a great way to use citrus peel that might otherwise be thrown away and too much in the compost bin at once isn’t great.
Elderflower cordial
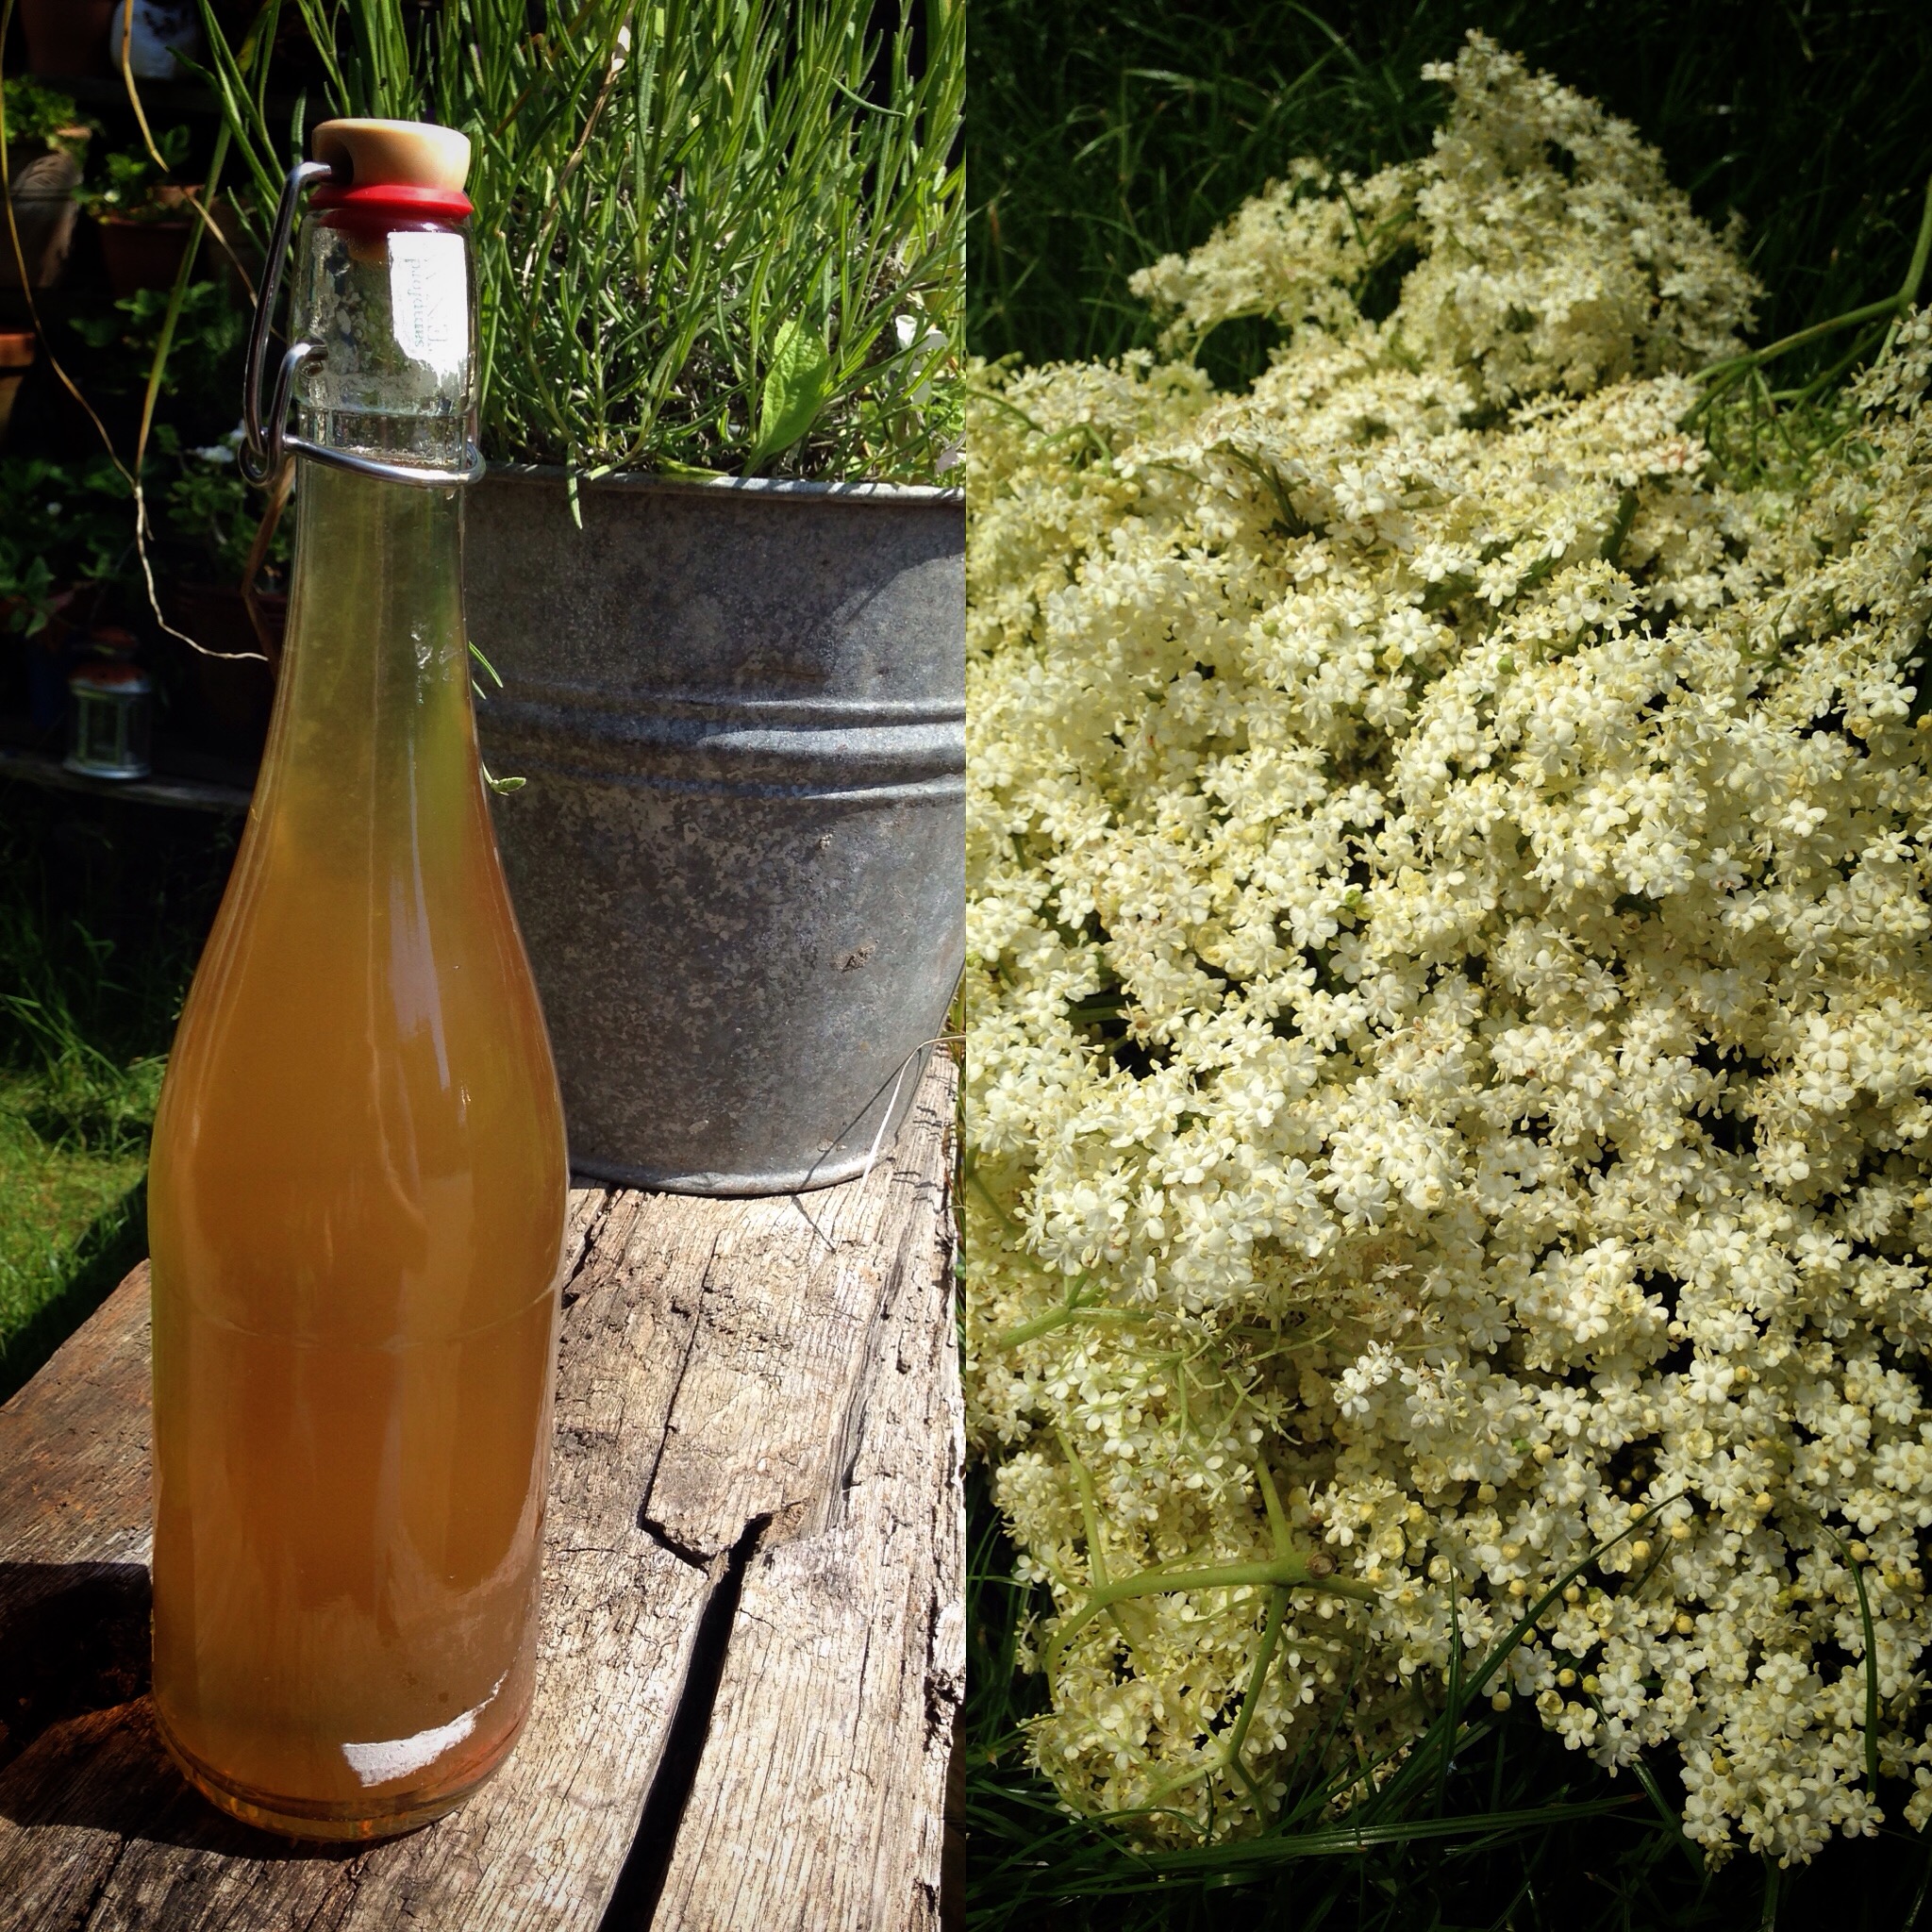
 One of life’s greatest pleasures (for me) is to be able to forage free plants and berries and turn them into something delicious! At this time of year, hedgerows are filled with delightfully scented Elderflower. Earlier this week, on a lovely sunny afternoon, I took a walk round what is technically ‘wasteland’ just at the end of our road – it is actually a haven for wildlife and plants. Every year, this piece of land (which was once part of an RAF base during the Second World War) provides us with as many blackberries as we can cope with, apples, Rowan berries and more. Right on the edge of this, I spotted a rather large elder tree heavy with buds and flowers. Ashley and I have made elderflower champagne in previous years, some successful batches and some not so great…and one bottle that found it’s way to our mechanic by way of thanks for some work he did, and ended up blowing the cupboard (in which it was being stored) door off!! (A box of chocolates was then needed as an apology to his wife who was left with the sticky clean up!) Something that I really wanted to try this year was elderflower cordial. I found a recipe here and it looked simple enough so I got started!
I started off by stripping the flowers from the stalks. A little bit of a tedious task but sat in the sunshine with the radio on, it wasn’t too bad! I was actually using half the amount stated in the recipe as I wanted to see what it was like before making big batches. Once that was done, it was just a matter of leaving it to steep overnight with the lemon zest. I didn’t have a lime so I just omitted it, hoping it wouldn’t affect the flavour too much!
The following day, I finished the recipe off by straining the liquid off, heating it and adding lemon juice and sugar. The mixture is then simmered and bottled – really quite simple! Whilst bottling, I tried to pass it through some muslin cloth to strain out the lemon ‘bits’ that were floating in it – only for aesthetic reasons really – but it was taking a REALLY long time to drip through so I abandoned that. After taking a few photographs, I poured myself a little and diluted it with water. Yummy! I can honestly say that making this was a pleasure and what a treat to be able to sample it immediately! Ashley enjoyed a glass as soon as he was home from work and I think he’s a fan too! Since then, I’ve been enjoying it diluted with diet lemonade and it is utterly delicious! It can be used for making other treats too, such as jellies and I’ve spotted a recipe for a jam that uses it – I can’t wait to try that one!
Start of the harvest

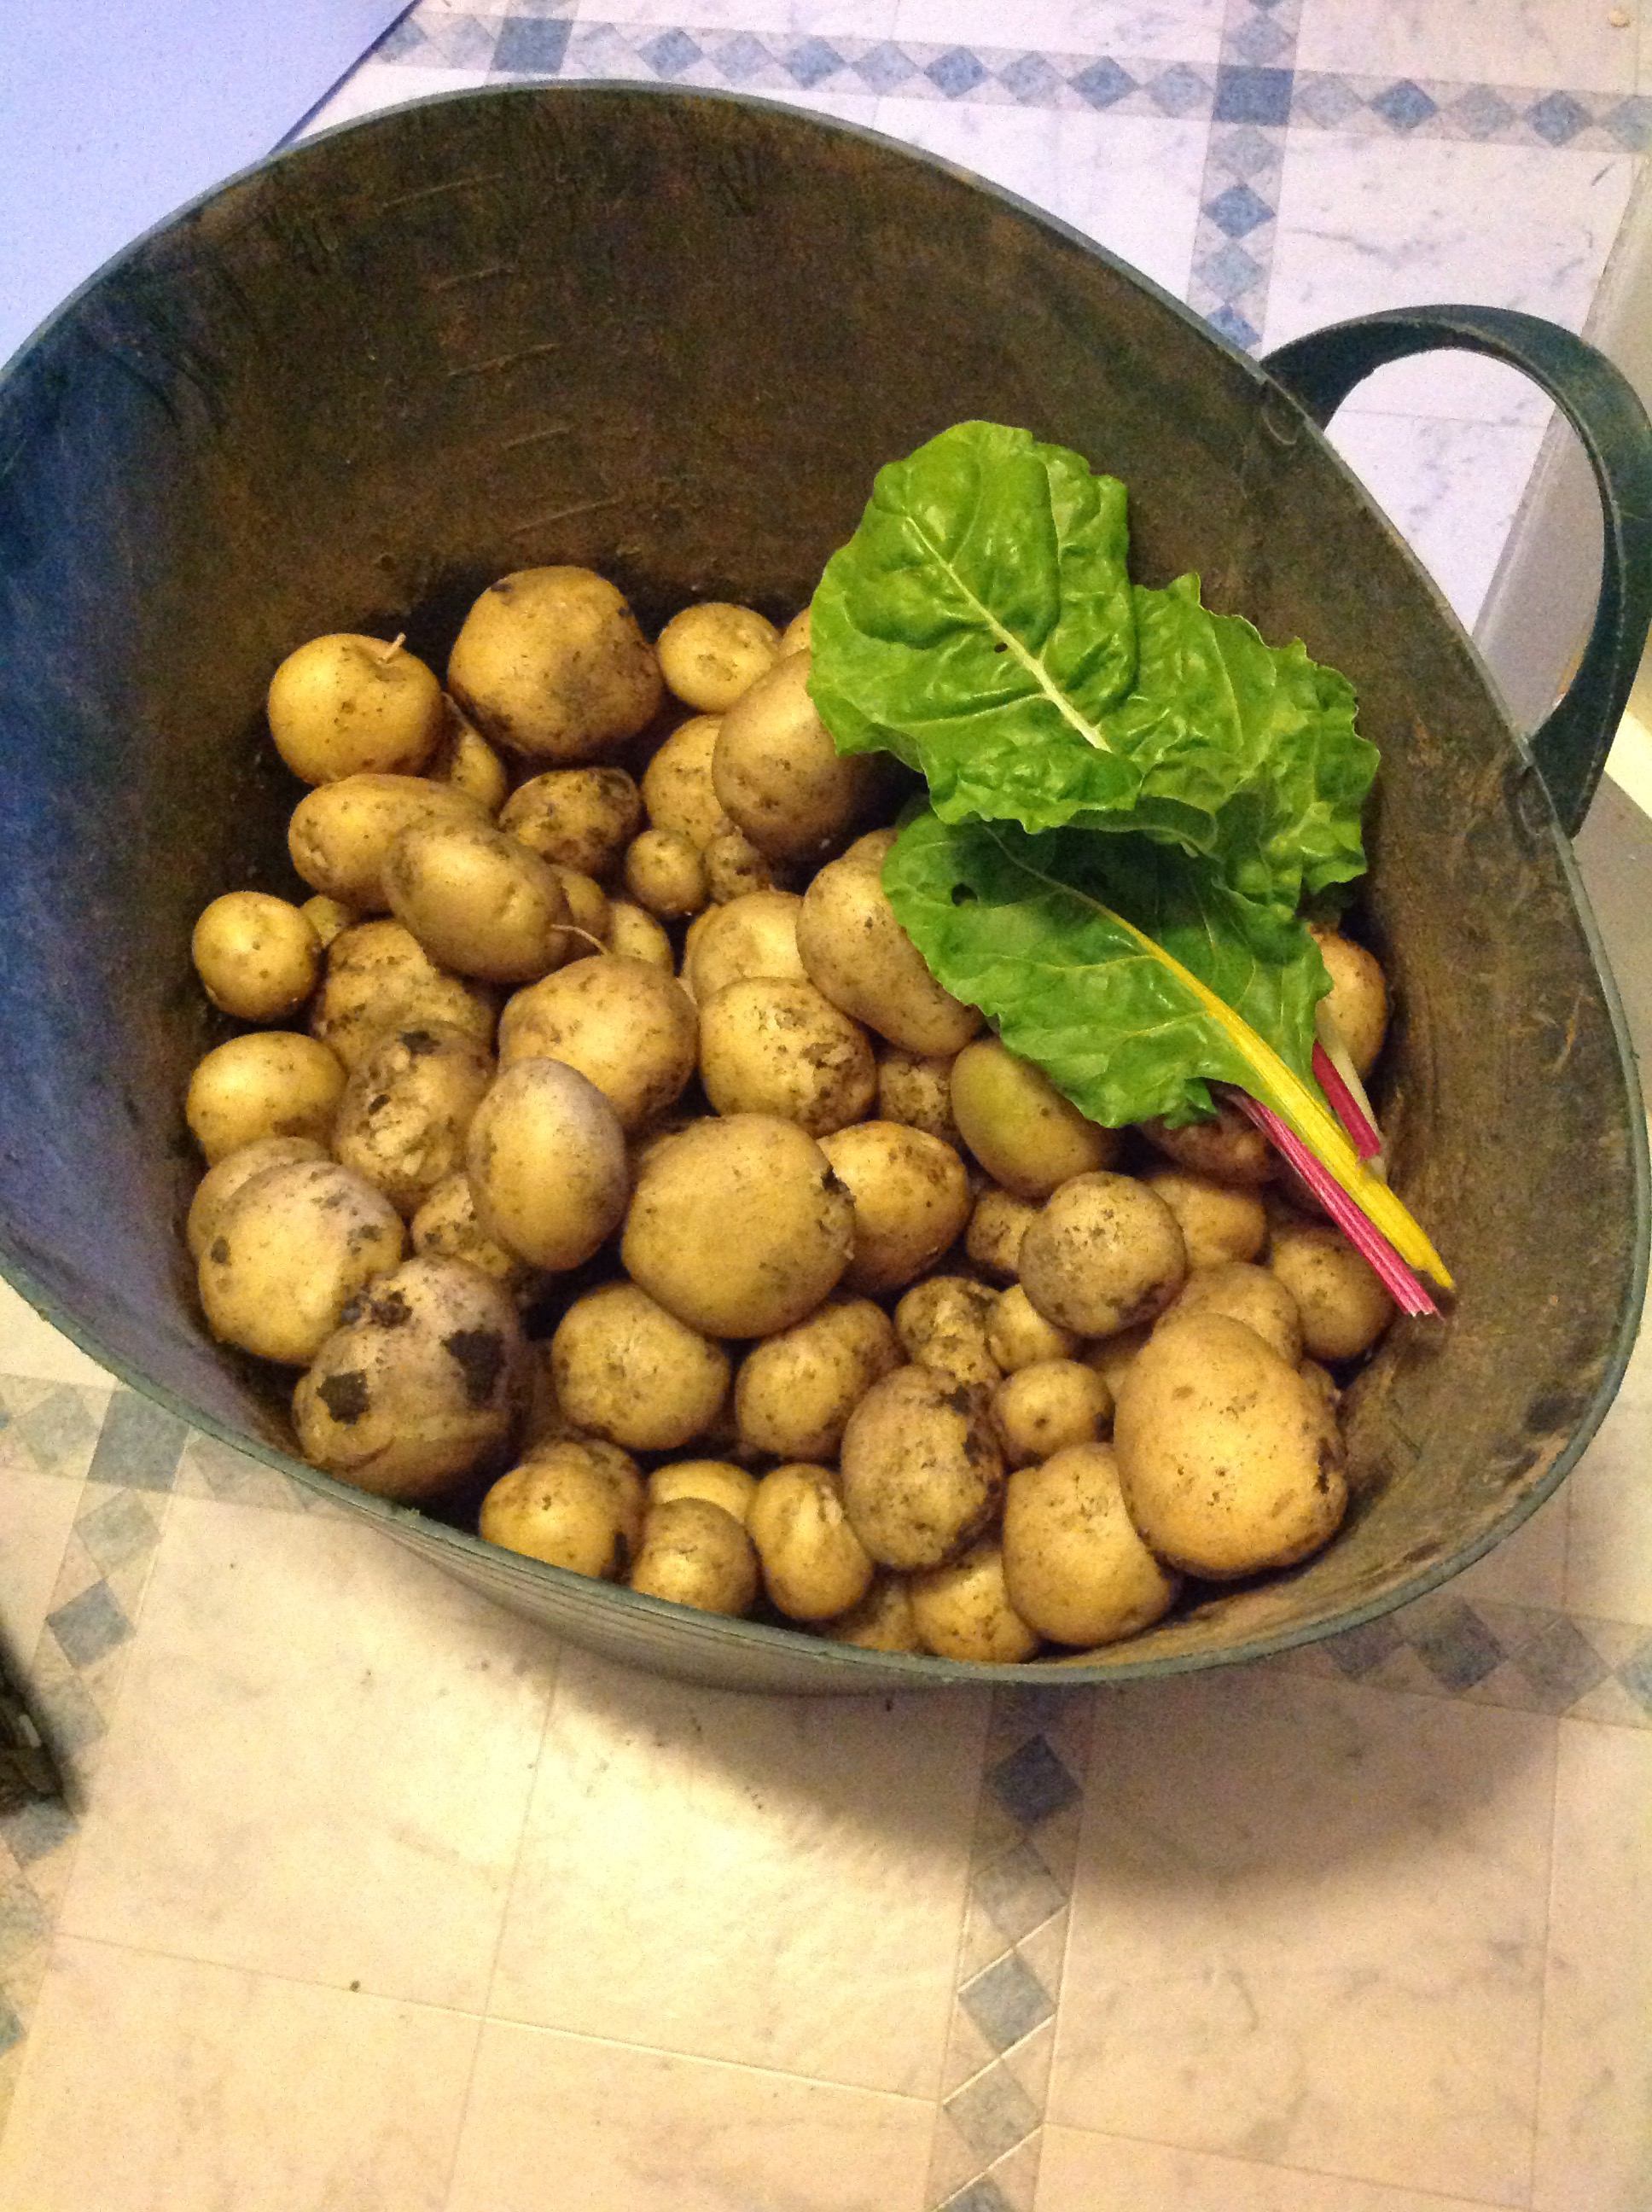
 A quick trip to the allotment this evening was a pleasure, even in the cool and misty weather we’ve had today. We pulled up the first potato plant and brought these beauty’s home, this should last us the week! I also picked just a few swiss chard leaves. It’s great to finally have produce to bring home, even if it is just the basics!
We planted out the leeks that have been growing away nicely in the greenhouse – they’ve been exposed to the elements for the last couple of days and now the nights are warming up, I think they will do just fine as long as the rabbit doesn’t take a shine to them!
Ashley managed to sneak a quick photo and video of the Swallows nest in the tool shed – I’ll show you what he found in another post very soon!
Finding an alternative Laundry soap
I have tried not to use commercial laundry detergents for a few years now. First I tried soap nuts, little dried fruit shells that contain a lot of saponin (soap). They are supposed to be hypo-allergenic, can be reused several times and are compost-able. The grey water can be used in the garden too, which was something that we were interested in (although haven’t actually got round to implementing a grey water system). The downside was that they don’t grow in the UK and so have to be shipped in from much hotter countries. Once I started using them in the washing machine, I found that I needed to use a higher temperature to get a good clean and at the time, my washing machine took about two hours to wash at anything warmer than 30 degrees! I liked the fact that you used them 3 or 4 times before they were ‘used up’ and they then had a 5th use in the compost. Unfortunately, sometimes the little bag they are used in would come open and then you’d have little pieces of the shells all over your clothes. This was easily solved by using a reusable bag clip (the sort you might reseal your loaf of bread with) to hold the top of the bag closed. I had also tried making hand soap out of it by boiling the ‘nuts’ to extract the soap. The hand soap was OK, but I REALLY hated the smell of the soap nuts boiling. So the box I had went under the sink and has stayed there ever since.
Around that time, I was given some ‘eco balls’ as a birthday gift (maybe a strange gift to some, but exactly the sort of thing that I like!). These had little ‘pellets’ (refillable) contained within a hard plastic ball and a foam ‘cushion’ around that to stop them making so much noise in the machine and possibly damaging clothes. These were really easy to use – just throw in the machine (there were two of them in the pack) and away you go. These I used for much longer than the soap nuts (in fact I’ve been using them for most of the last 2 years), but again, they seem to work better at hotter temperatures and whites certainly need something a bit extra to keep looking good. And if anything was heavily soiled with perspiration, mud, etc then I would often end up putting these things through at least 2 wash cycles to get clean. So, I would often end up being tempted to buy a small bottle of well known commercial washing liquid or powder for washing heavier soiled things, whites and towels. I think I just never really believed that things were getting very clean.
I had been getting more and more reliant on commercial detergents again, and I even bought a pack of the liquid filled capsules recently – ridiculously expensive and have more liquid in each one than you need so is quite wasteful in my opinion. I made the decision to change my ways, do some research and try to find some alternatives. Another Pintrest trawl put me onto this tutorial for a laundry soap made with castile soap and bicarb – as you know, 2 of my current favourite things! It seemed pretty simple and I was drawn to the limited ‘ingredients’ list. I have seen many other tutorials for home made laundry soap and most contain Borax or hydrogen peroxide and a whole variety of things, which is really not what I was after.
I had the necessary ingredients to hand so there was really no reason not to try it. It was very simple to make which is always a plus! I used the first dose on some bedding – it seemed to come out looking, feeling and smelling clean. I didn’t bother adding any essential oil as the castile soap I was using was scented anyway, so the laundry only had a very subtle scent which I prefer anyway. The following day, I went to put on another load of laundry, this time a coloured load with a fairly stinky t-shirt, and the liquid had completely separated and not even vigorous shaking of the bottle would mix it. I had to give it a really good stir with a spoon and was thinking that it was going to be very impractical if I was going to have to do that every time I wanted to use it. The second load again came out fresh as a daisy, even the stinky t-shirt. By the late evening, the liquid hadn’t separated like it did before, only slightly, and was easily mixed together by giving the jar a quick shake. This was much more what I was expecting, leading me to the conclusion that I didn’t mix it enough first time. I will keep using this for now, I’ll let you know how I get on.
Let me know in the comments if you use an alternative laundry detergent, what are your motivations for doing so?
Thanks for reading!
16th June, quick allotment visit

I popped by the allotment this morning as I was nearby.
There was a rabbit on the plot, not quite a baby but certainly small. I think I’ve figured out where he’s getting in so will have to fix that soon. Luckily, he doesn’t seem to be doing too much damage, though my herb fennel has taken quite a battering! The fleece that I covered the chard with is doing it’s job and I put some netting over the peas so they’re OK. I think the onions are too big now to really be affected by a little bunny, hopefully he’ll be too big soon to hop through the fence.
The parsnip foliage seems to be almost doubling each time I go to the allotment! I did some thinning out as they were getting a bit crowded, the chickens are now enjoying the thinnings – if it’s not composted, the chickens get it so nothing goes to waste!
Aphids had visited the pepper plants in the greenhouse so I sprayed them with water and wiped them off. I’ve heard that aphids don’t like citrus so I’ll take some lemon juice down next time I go and add it to the spray bottle. At home, I use soapy water on the roses etc but would rather not put soap on the edible stuff.
Last Friday, Ashley and I put in a new ‘no dig’ bed, I’ll show you what we did in another post soon. That was looking great today, a few weeds on the surface but it is very hot today and they had wilted anyway. I can’t wait to get planting in that one, but I don’t want to get caught out like we did before with weeds overtaking the plants so I’ll give it a few more days. The leeks are patiently waiting in the greenhouse to go in this bed. I must put them outside actually to harden off. Do you need to harden off leeks? I have no idea, but I’d rather not lose them for the sake of doing something as simple as leaving them outside somewhere sheltered for a few days.
See you soon!